- 微信扫一扫 -
QQ:181814630
电话:15116362044
演示角色 | 演示地址 | 账号 | 密码 |
---|---|---|---|
后台PC端 | 点击进入 | dsshop | 123456 |
用户PC端 | 点击进入 | buyer | 123456 |
手机端 | 点击进入 | buyer | 123456 |
安卓APP下载地址 | http://www.csdeshang.com/document/dsshop/dsshop_uniapp_android.apk |
用户端
用户手机端安卓APP
(使用浏览器打开)
演示角色 | 演示地址 | 账号 | 密码 |
---|---|---|---|
后台PC端 | 点击进入 | dso2o | 123456 |
用户PC端 | 点击进入 | buyer | 123456 |
卖家PC端 | 点击进入 | buyer | 123456 |
服务机构PC端 | 点击进入 | 后台添加 | |
用户手机端 | 点击进入 | buyer | 123456 |
商家手机端 | 点击进入 | buyer | 123456 |
配送员 | 点击进入 | 测试配送员 | 123456 |
服务机构手机端 | 点击进入 | test1 | 123456 |
安卓APP下载地址 | http://www.csdeshang.com/document/dso2o/dso2o_uniapp_android.apk |
用户端
商家端
配送员管理端
服务机构端
用户端安卓APP
(使用浏览器打开)
商家端安卓APP
(使用浏览器打开)
配送员管理安卓APP
(使用浏览器打开)
服务机构安卓APP
(使用浏览器打开)
演示角色 | 演示地址 | 账号 | 密码 |
---|---|---|---|
后台PC端 | 点击进入 | dsmall | 123456 |
用户PC端 | 点击进入 | buyer | 123456 |
商家PC端 | 点击进入 | buyer | 123456 |
用户手机端 | 点击进入 | buyer | 123456 |
商家手机端 | 点击进入 | buyer | 123456 |
门店手机端 | 点击进入 | seller | 123456 |
安卓APP下载地址 | http://www.csdeshang.com/document/dsmall/dsmall_uniapp_android.apk |
用户端
商家端
门店端
用户安卓APP(使用浏览器打开)
商家安卓APP(使用浏览器打开)
门店安卓APP(使用浏览器打开)
修改chat.js文件
1.
var http = require('http'); 改为 var http = require('https');
2.
把 var server = http.createServer(function (req, res) {
如果是windows系统 替换为
let fs = require("fs"); let pfxpath = '证书路径.pfx'; // var server = http.createServer({ pfx: fs.readFileSync(pfxpath), passphrase: '证书密码'},function (req, res) {
如果是Linux系统 替换为
let fs = require("fs"); let certpath = '证书路径.pem'; // let keypath = '私钥路径.pem'; var server = http.createServer({ cert: fs.readFileSync(certpath), key: fs.readFileSync(keypath)},function (req, res) {
1.在服务器端进入Nodejs官网下载安装即可,官网地址:https://nodejs.org/zh-cn/(推荐Nodejs最新版本,因为低版本安装不了比如6.1.7版本就无法安装)
2.程序目录下新建目录用来存放Nodejs应用。把相关文件传至新建目录(相关文件询问管理员)
3.修改config.js 修改数据库配置文件,以及Nodejs 端口
var config = {};//数据库帐号设置 config['host'] = 'localhost';//数据库地址 config['port'] = '3306';//数据库端口 config['user'] = 'root';//数据库用户名 config['password'] = 'root';//数据库密码 config['database'] = 'ds_mall';//mysql数据库名 config['tablepre'] = 'ds_';//表前缀 config['insecureAuth'] = true;//兼容低版本 config['debug'] = false;//默认false exports.hostname = 'www.csdeshang.com';//把网址修改为你安装商城的域名,授权连接的域名或IP,为空不限制, exports.port = 8080;//服务器所用端口号,默认3000 exports.config = config;
4.在目录内依次执行 install_socket_io.bat 、 install_mysql.bat 、im.bat文件
5.服务器访问 localhost:端口号 外部访问 IP:端口号 测试是否可以正常访问。
6.配置防火墙开启对应端口
7.网站后台-》设置-》站点设置-》站内IM设置,开启IM,地址为 IP:端口号
1.Linux安装Nodejs 简单安装: yum install -y nodejs
yum install -y nodejs
(推荐Nodejs最新版本,因为低版本安装不了比如6.1.7版本就无法安装) 安装参考地址:https://jingyan.baidu.com/article/dca1fa6f48f478f1a5405272.html
2.程序目录下新建文件夹,新建文件夹用来存放Nodejs应用。把相关文件传至新建目录(相关文件询问管理员)
3.修改config.js 修改数据库配置文件,以及Nodejs 端口
var config = {};//数据库帐号设置 config['host'] = 'localhost';//数据库地址 config['port'] = '3306';//数据库端口 config['user'] = 'root';//数据库用户名 config['password'] = 'root';//数据库密码 config['database'] = 'ds_mall';//mysql数据库名 config['tablepre'] = 'ds_';//表前缀 config['insecureAuth'] = true;//兼容低版本 config['debug'] = false;//默认false exports.hostname = 'www.csdeshang.com';//把网址修改为你安装商城的域名,授权连接的域名或IP,为空不限制, exports.port = 8080;//服务器所用端口号,默认3000 exports.config = config;
4. Linux cd 进入到 新建文件夹 依次执行
npm install socket.io npm install mysql node chat.js //断开服务器连接后停止运行,可以使用forever npm install -g forever forever start chat.js //服务器重启后需重新执行,也可自行设置为自启动 npm install -g pm2 //不使用 forever 可用 pm2 pm2 start chat.js
或者使用forever pm2 进程管理
5.配置防火墙开启对应端口,如果是阿里云主机,需要单独配置安全组新增对应端口
6.服务器执行
curl localhost:端口
同时测试外网访问 ip:端口,访问结果如下表示成功
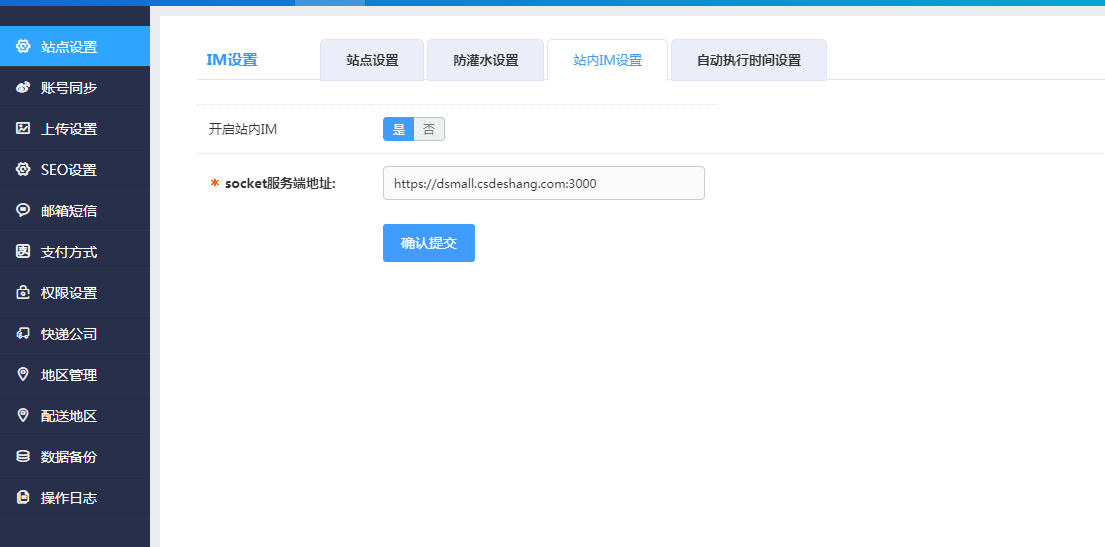
7.网站后台-》设置-》站点设置-》站内IM设置,开启IM,地址为 http://IP:端口号 或者https://IP:端口号(用访问域名替换IP也是可以的 如下图就是用域名替换IP)
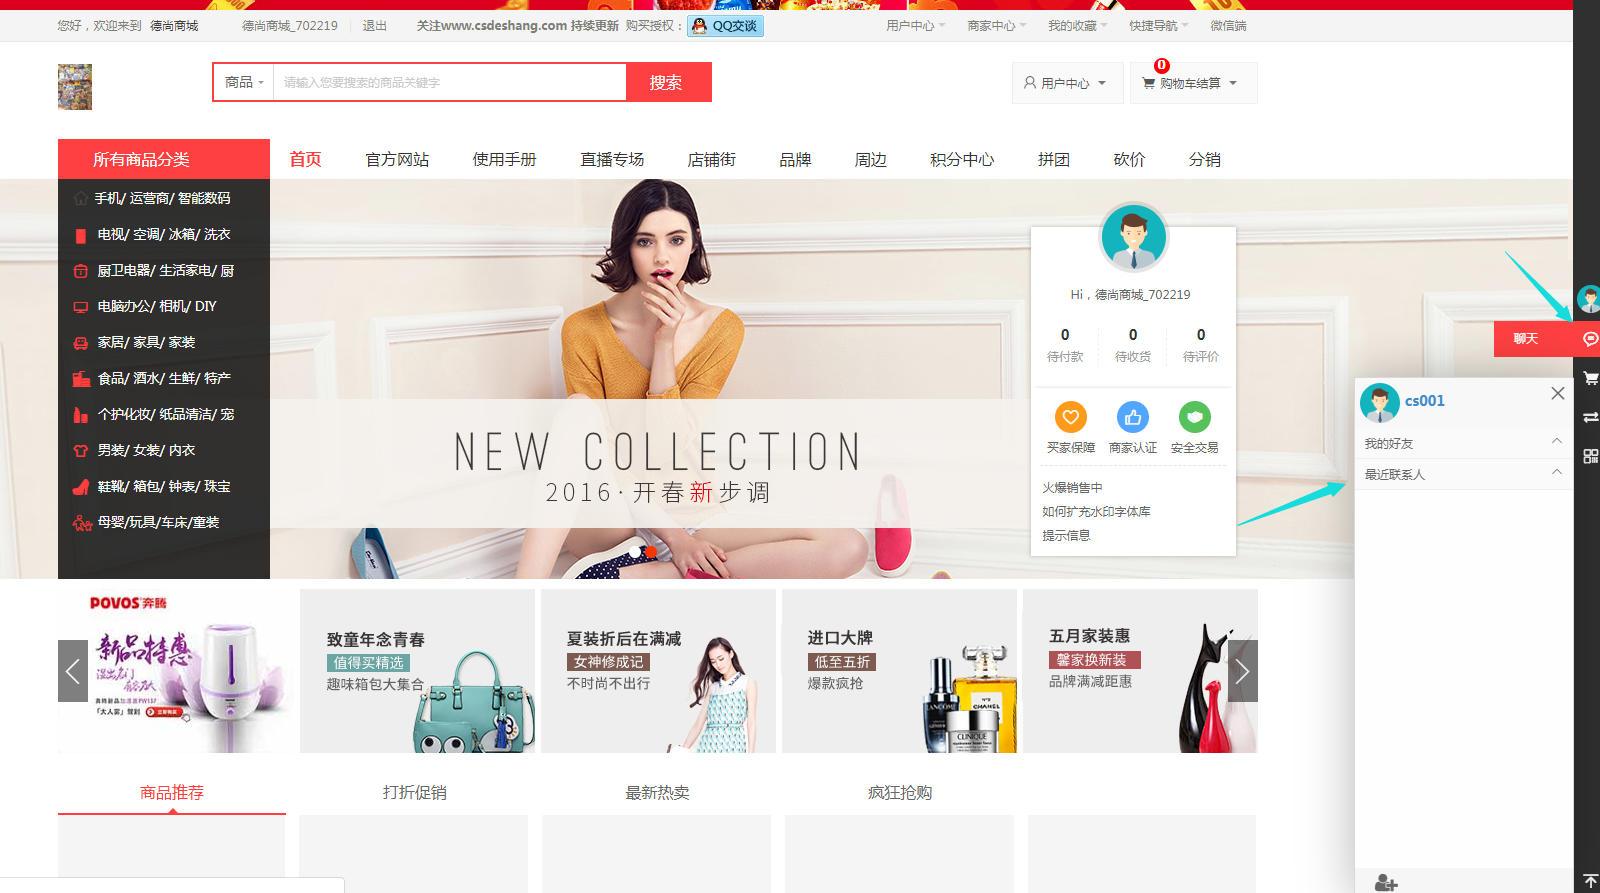
使用 网站右边侧边栏显示聊天按钮,点击出现弹出框 则可正常使用IM聊天了。